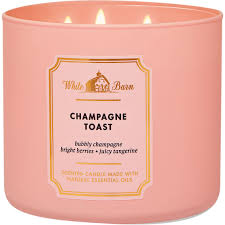
Crafting your own candles can be a delightful and rewarding experience, combining creativity with the soothing ambiance of a warm, flickering flame. The Champagne Toast candle, with its bright, bubbly scent reminiscent of celebratory moments, is a perfect choice for those looking to capture a festive spirit in their home or as a gift. In this guide, we’ll walk you through the step-by-step process of making your very own Champagne Toast candle, from selecting materials to the final touches.
Materials You’ll Need
Before you begin, gather all the necessary materials. Here’s a list of what you’ll need:
- Wax: Soy wax is a popular choice for making candles due to its clean burn and eco-friendly properties. You can also use beeswax or paraffin wax.
- Wicks: Choose cotton wicks appropriate for the size of your container. The thickness of the wick should correspond to the diameter of the container to ensure a proper burn.
- Fragrance Oil: Look for a Champagne Toast fragrance oil, or mix your own using a combination of citrus, bubbly champagne, and a hint of vanilla or berries.
- Containers: Select heat-resistant containers such as glass jars, tin cans, or ceramic vessels. Ensure they are clean and dry.
- Dye (Optional): If you want to color your candles, use dye specifically made for candle making.
- Double Boiler: A setup for melting wax safely. You can use a dedicated double boiler or improvise with a metal bowl over a pot of simmering water.
- Thermometer: A kitchen or candy thermometer to monitor the wax temperature.
- Stirring Utensils: A heat-resistant spoon or spatula.
- Wick Centering Devices: These help keep the wick centered while the wax sets. You can use wick bars, clothespins, or chopsticks.
- Scissors: For trimming the wick.
Step 1: Preparing Your Workspace
Start by setting up a clean, organized workspace. Cover your surface with newspaper or a protective cloth to catch any spills. Make sure all your materials are within easy reach. Safety is crucial, so keep a fire extinguisher nearby and avoid working near flammable materials.
Step 2: Measuring and Melting the Wax
Begin by measuring the amount of wax you’ll need. A good rule of thumb is to use two times the volume of your container, as the wax will shrink slightly when it cools. For example, if your container holds 8 ounces, you’ll need approximately 16 ounces of wax.
Using the double boiler method, melt the wax. Place the wax in the top part of the double boiler and allow it to melt slowly over medium heat. Stir occasionally to ensure even melting. Avoid direct heat, as this can cause the wax to burn.
Step 3: Preparing the Wick and Container
While the wax is melting, prepare your wick and container. Attach the wick to the bottom center of the container using a small amount of melted wax or a wick sticker. Secure the wick in place using a wick centering device, ensuring it stays upright and centered.
Step 4: Adding Fragrance and Color
Once the wax reaches the appropriate temperature (usually around 170-180°F for soy wax), remove it from the heat. Allow the wax to cool slightly to around 160°F before adding fragrance oil and dye. This prevents the fragrance from evaporating too quickly.
Add the Champagne Toast fragrance oil to the melted wax. The recommended amount is usually 6-10% of the total wax weight, but check the specific recommendations for your fragrance oil. Stir gently but thoroughly to ensure the fragrance is evenly distributed.
If you’re using dye, add it at this stage. Start with a small amount, and add more if needed, stirring until the color is evenly mixed.
Step 5: Pouring the Wax
Carefully pour the scented and colored wax into your prepared container. Pour slowly and steadily to avoid creating air bubbles. Leave a small space at the top of the container to prevent overflow and to allow room for the wax to settle as it cools.
If you’re making multiple candles, pour each one individually, and ensure the wick stays centered as you move on to the next.
Step 6: Cooling and Setting
Allow the candles to cool and set undisturbed. This process can take several hours, depending on the size of the candle and the ambient temperature. It’s crucial to let the candles cool slowly to prevent cracking or uneven surfaces.
As the candles cool, the surface may sink slightly or form a small well around the wick. If this happens, you can reheat some leftover wax and pour it over the surface to fill in any imperfections.
Step 7: Trimming the Wick
Once the candles have fully cooled and hardened, trim the wick to about 1/4 inch above the wax surface. This length is optimal for burning, as it ensures a steady flame without excessive smoke or soot.
Step 8: Curing the Candle
While you can light your candle immediately, it’s best to let it cure for a few days. Curing allows the fragrance to fully bond with the wax, resulting in a stronger scent throw when burned. Store the candles in a cool, dry place during this time.
Step 9: Labeling and Personalization
For a final touch, consider labeling your Champagne Toast candle with a name, date, or special message. This is especially nice if you’re giving the candle as a gift. You can create custom labels or use decorative stickers.
Step 10: Enjoying and Caring for Your Candle
When you’re ready to enjoy your candle, light it in a safe, draft-free area. To ensure an even burn, let the candle melt all the way to the edges of the container during the first burn. This helps prevent tunneling and maximizes the lifespan of your candle.
Always follow basic candle safety: never leave a burning candle unattended, keep it away from flammable materials, and trim the wick before each use to 1/4 inch to maintain a clean burn.
Conclusion
Crafting a Champagne Toast candle is a delightful project that combines creativity and craftsmanship. Whether you’re making it for yourself or as a gift, the process allows you to personalize the scent and appearance of the candle, creating a unique and meaningful addition to any space. With these step-by-step instructions, you can confidently create a beautiful candle that captures the essence of celebration and joy. Enjoy the warm glow and delightful fragrance of your handmade creation!
Leave a Reply