Introduction to Periosteal Elevators
If you’re venturing into the world of dental surgery, mastering the use of a periosteal elevator is essential. This handy tool can make all the difference in your surgical precision and patient outcomes. Designed for lifting and separating tissue from bone, a periosteal elevator plays a crucial role in various procedures. Whether you’re an experienced professional or just starting out, understanding how to effectively install and utilize this instrument can enhance your skills significantly.
In this guide, we’ll dive deep into what makes a periosteal elevator indispensable in dental practices. You’ll learn about its benefits, different types available on the market, and get step-by-step instructions on how to install one correctly. Plus, we’ll highlight common pitfalls to avoid along the way. So grab your instruments and let’s get started!
Benefits of Using a Periosteal Elevator
Using a periosteal elevator offers numerous advantages in surgical procedures. One of the primary benefits is its ability to minimize trauma to surrounding tissues. This precision helps preserve blood supply, enhancing the healing process.
Another key advantage is improved visibility during surgery. By lifting the periosteum away from bone structure, surgeons can access critical areas more effectively. This clarity allows for better decision-making throughout the procedure.
Additionally, employing a periosteal elevator can lead to more efficient surgeries. With reduced tissue disruption and enhanced accessibility, surgeons often complete their tasks quicker while maintaining high standards of care.
Patient outcomes also benefit significantly from this tool. Less invasive techniques generally result in shorter recovery times and decreased post-operative pain for patients.
The versatility of periosteal elevators makes them suitable for various dental and orthopedic procedures, adding further value to their use in clinical settings.
Types of Periosteal Elevators
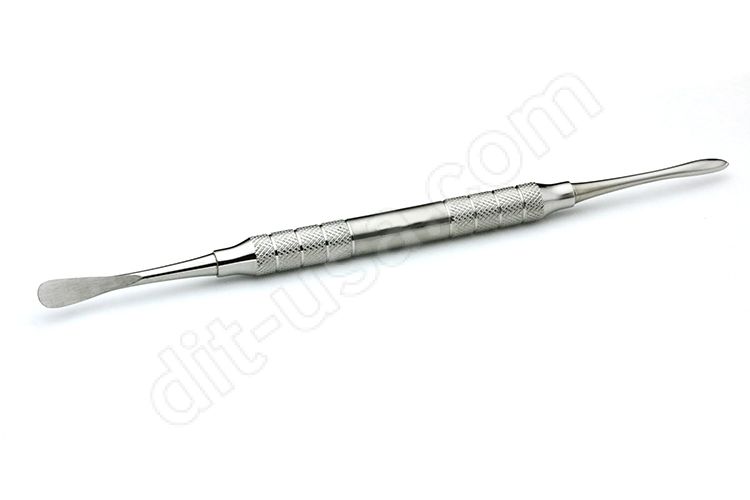
Periosteal elevators come in various types, each designed for specific procedures and anatomical considerations. The most common include the double-ended elevator, which features two different working ends for versatility during surgery.
Another popular type is the spoon-shaped periosteal elevator. Its unique design allows for gentle lifting of the periosteum without causing damage to surrounding tissues. This makes it ideal for delicate surgeries.
Straight elevators offer precision and control when separating tissues. They’re particularly useful in extracting teeth or preparing bone surfaces.
For those dealing with more complex cases, curved elevators provide added maneuverability around intricate anatomy. Their shape helps navigate challenging areas effectively.
Choosing the right type depends on your surgical needs and experience level. Familiarity with these variations enhances both safety and efficiency during procedures.
Step-by-Step Guide to Installing a Periosteal Elevator
Preparing the surgical area is crucial. Ensure everything is sterile to prevent infection. Lay out your instruments and have a clear workspace.
Next, selecting the right size and shape of elevator matters greatly. Choose one that fits well with the specific procedure you are performing. The wrong tool can complicate things unnecessarily.
Proper handling is key throughout this process. Grip the periosteal elevator firmly but gently. Position it at an angle that allows for smooth insertion under the periosteum without excessive force.
When placing the elevator, start slowly at a designated point on the tissue surface. Carefully slide it beneath; feel for resistance as you go deeper into layers of soft tissue while maintaining control.
Watch your technique closely to ensure precision and safety during usage. Proper application will lead to successful outcomes in any surgical context involving soft tissues.
A. Preparing the Surgical Area
Preparing the surgical area is a critical first step when using a periosteal elevator. A clean and organized environment sets the stage for successful procedures.
Start by ensuring that all instruments are sterilized. This minimizes the risk of infection and complications during surgery. Lay out your tools methodically, so they’re easily accessible when needed.
Next, create a sterile field around the operating site. Use drapes to cover surrounding areas, protecting them from contamination.
Make sure adequate lighting illuminates the workspace; proper visibility can make all the difference in precision tasks like handling an elevator.
Ensure that your patient is comfortably positioned. Their comfort not only aids in procedure success but also contributes to overall safety throughout surgery. Taking these steps ensures you start on solid ground as you work with this essential tool.
B. Selecting the Right Size and Shape of Elevator
Choosing the right size and shape of a periosteal elevator is crucial for effective results. Each surgical situation may demand different specifications, making this decision paramount.
Consider the area of operation. A smaller elevator works well in tight spaces, especially around delicate structures. Conversely, larger elevators are suitable for broader applications, providing ample coverage.
Shapes also play a significant role. A curved tip can navigate contours better than a straight blade, allowing easier access to specific areas. Examine your requirements carefully before selecting an instrument.
Don’t hesitate to keep multiple sizes on hand during procedures. This flexibility ensures you have the right tool at your disposal when needed most. The goal is precision and efficiency throughout the surgery without compromising safety or outcomes.
C. Proper Handling and Placement of the Elevator
Proper handling of a periosteal elevator is crucial for effective results. Always hold the instrument firmly but gently, avoiding excessive pressure that could damage tissue.
When placing the elevator, ensure it’s positioned at the correct angle. Aiming too steeply can lead to unwanted trauma and complicate your procedure.
Using a smooth motion will help you maneuver beneath the periosteum without causing injury. Remember, slow and steady wins this race—rush can lead to mistakes.
As you lift with the elevator, maintain an awareness of surrounding structures. This mindfulness protects adjacent tissues from unnecessary harm.
Keep your workspace organized. Having easy access to instruments minimizes distractions and helps maintain focus during delicate tasks like these.
Common Mistakes to Avoid When Installing a Periosteal Elev
When installing a periosteal elevator, it’s essential to be aware of common pitfalls that can hinder your success. One frequent mistake is not adequately preparing the surgical area. A cluttered workspace can lead to accidents or injuries, so ensure everything is well-organized before you start.
Another issue is selecting the incorrect size or shape of the elevator for your specific needs. Using an inappropriate tool can cause unnecessary trauma to surrounding tissues and complicate the procedure. Always take time to assess your options carefully.
Proper handling and placement are crucial as well. Many practitioners rush this step, leading to improper insertion angles that can damage delicate structures. Maintain a steady hand and follow best practices for placement.
Some may overlook post-installation checks on their tools. Regularly inspect your periosteal elevators for wear or damage before each use; outdated instruments can compromise outcomes.
By steering clear of these mistakes, you’ll enhance both efficiency and effectiveness in using a periosteal elevator during surgical procedures.
Leave a Reply